Quick Update Post

It’s been a long time since my last post and between work and hiking, I’ve not had much time to write these posts. I’ve also not done any big hike quite worthy of its own post, so this is just a quick catch up with some photos and bits and pieces that I think are interesting enough to share.

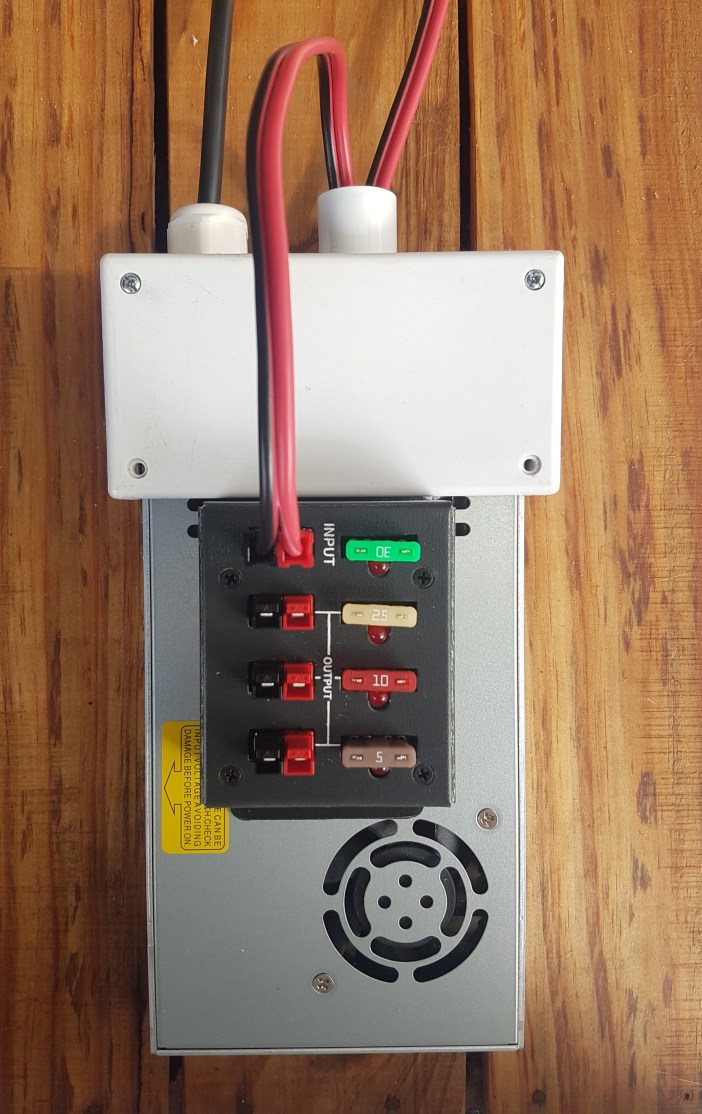
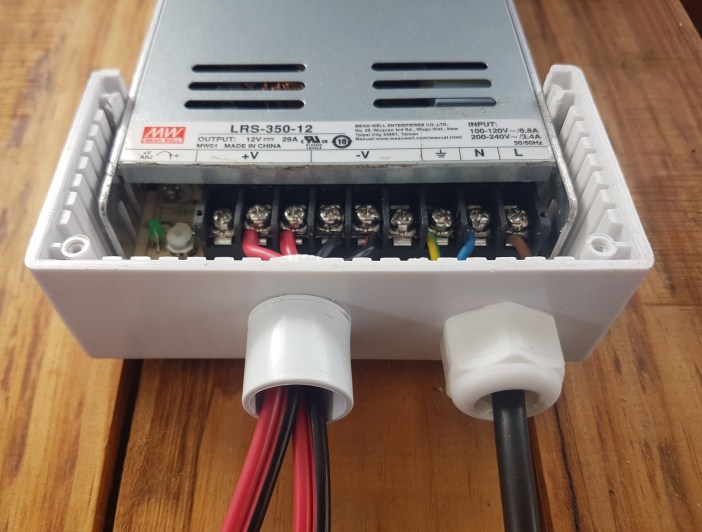
Power Supply Enclosure

Sharing this because I’d been struggling to come up with a good solution for a while and finally came up with this, which is cheap and works really well. This design keeps the scary bits safe while letting the fan breathe. The plastic is secured to the chassis at the bottom via two M3 fasteners. Far better than enclosing the entire PSU in a big enclosure (especially since it takes up less space in a bag).

20190414_123422.jpg

20190414_123202.jpg


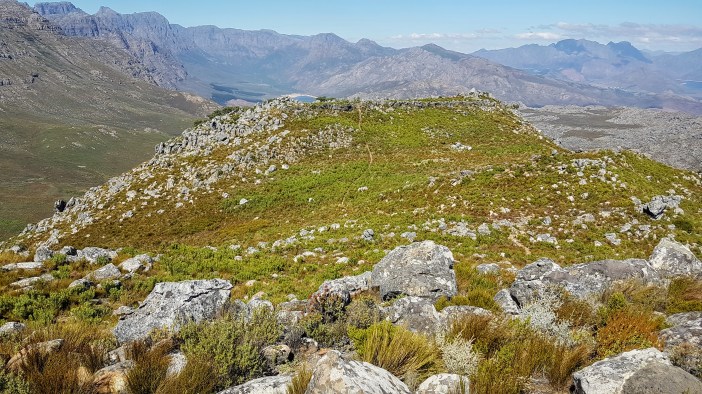
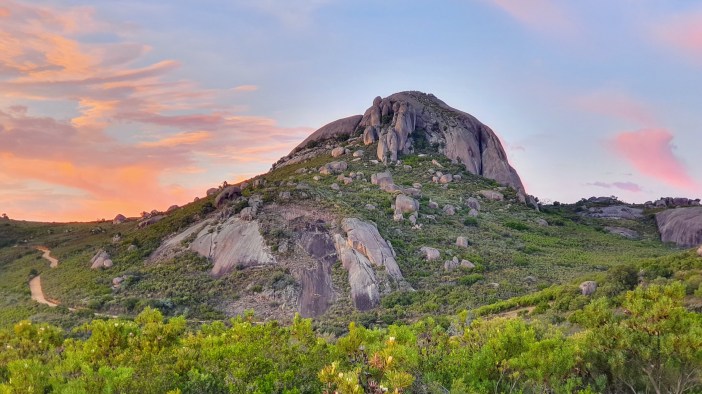
Paarl Nature Reserve Mini-Adventure

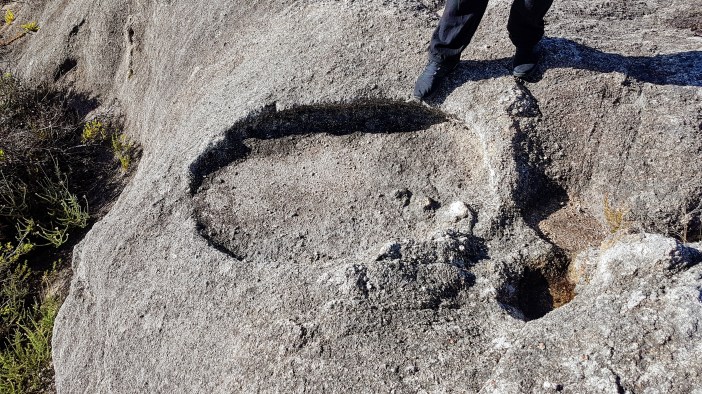
There’s a SOTA summit (ZS/WC-845 – Groot-Waboomkop) in the Paarl Nature Reserve. Initially, we had planned a big hike there, but I had a brand new pair of boots and I wanted some time to test out a new antenna (The Chameleon Emcom III Portable). Markus came with and hauled his full-size 100w radio, tuner and truck battery through the bush to our setup spot on top of a rock. I like to keep things simple so took my little QRP radio and the new antenna.

20190419_070811 (1).jpg

20190419_111802.jpg
Markus’ “Portable” rig
20190419_181306.jpg
My Inverted-V that I should have stuck with
20190419_085258.jpg
Please note my bashed up legs. That’s how tough I am 🙂

We discovered a few things.

  • Big commercial radios sound amazing.
  • 5 watts performs incredibly well most of the time.
  • My brand new Chameleon antenna is faulty. Weird SWR, but on the day there were too many variables so I assumed I was doing something wrong. Subsequently, I’ve confirmed that it is faulty in a controlled environment and Chameleon have sent a replacement which has been sitting in customs for the last few weeks 😦
  • The Bundu Basher antenna (a cost-effective locally made half-wave end fed) works great. I’m looking forward to testing it against a working Emcom III. (which is 10x the price)


QRPGuys TriBand Vertical

20190421_145551 (1).jpg

I got the Tri-Band vertical kit via a friend coming back from the US. It really is a well put together kit and I enjoyed the assembly. (soldering meditation). I’ve not had enough chances to test it properly, but I’m hoping to rectify that soon and will report back. Part of the problem is that my trusty DIY Inverted-V antenna is just so good that it’s hard to justify playing around with anything else.


Bundu Basher Mods

The Bundu Basher is a great, cost-effective locally made end-fed antenna (1:64) but its construction is not suitable to backpacking due to the large plastic enclosure and SO-239 connector. I rebuilt it into a smaller chassis and will soon add lightweight wire for QRP use, with the aim that the entire thing should roll up into a pencil bag. For portable ops, wing-nuts should never be allowed to fall off, so I stole this clever approach from the QRP Tri-Band. This is not a weatherproof enclosure but should survive an overnight camp with some mist etc.
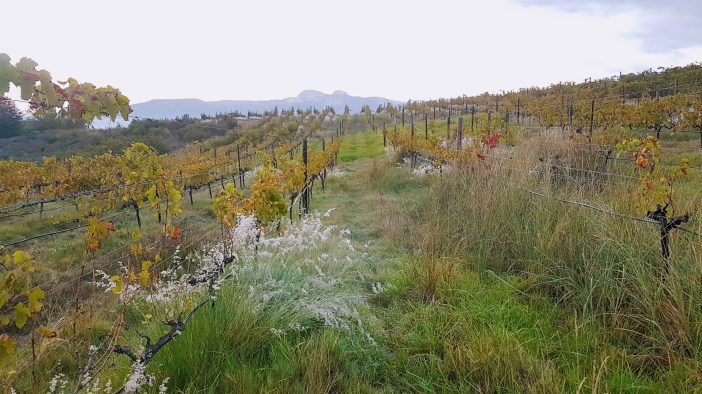
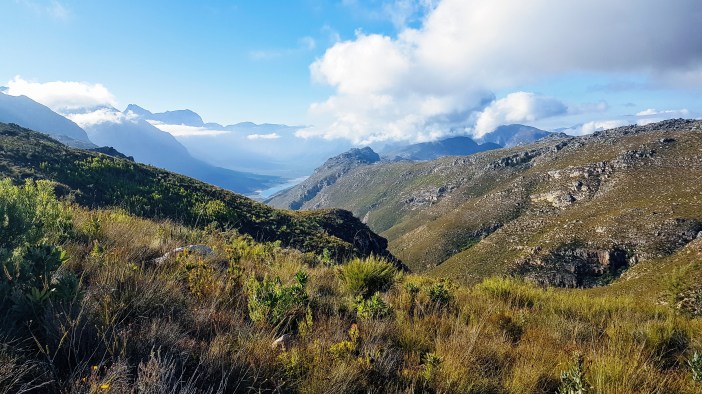
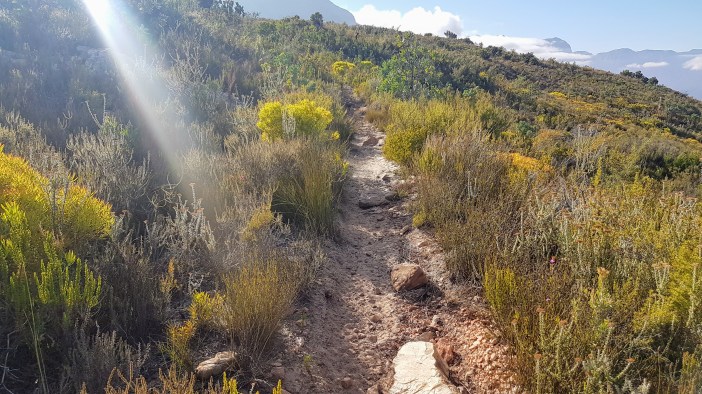
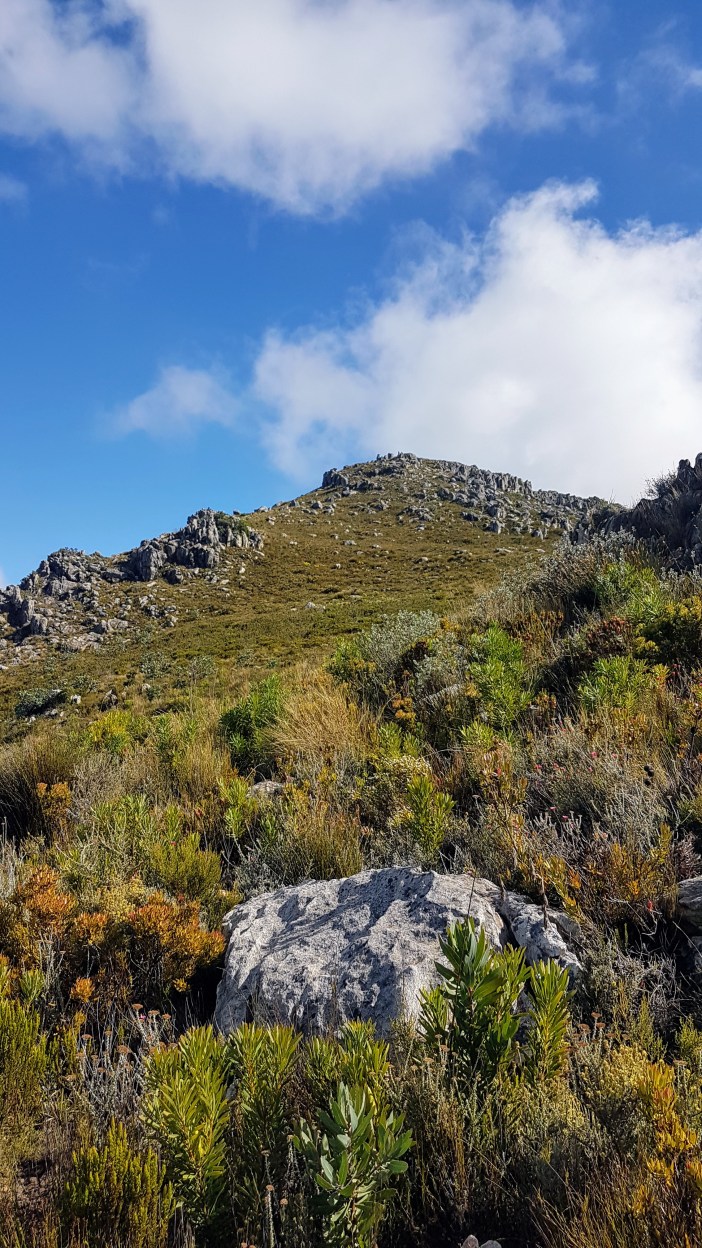
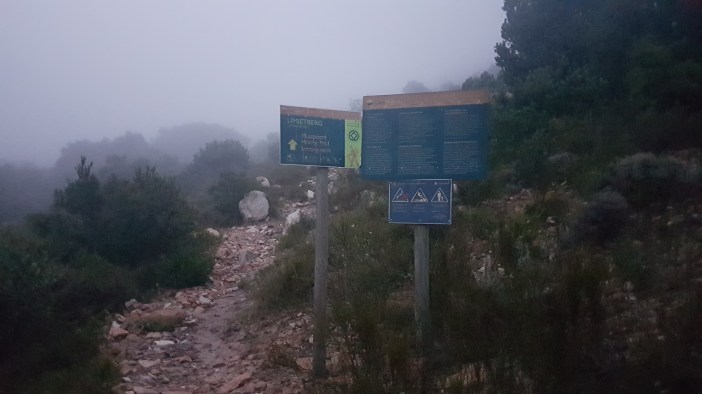
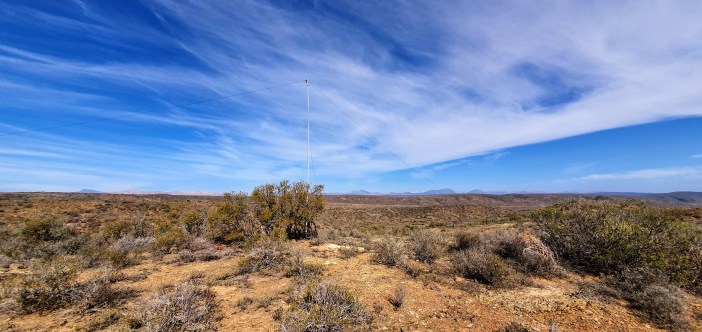
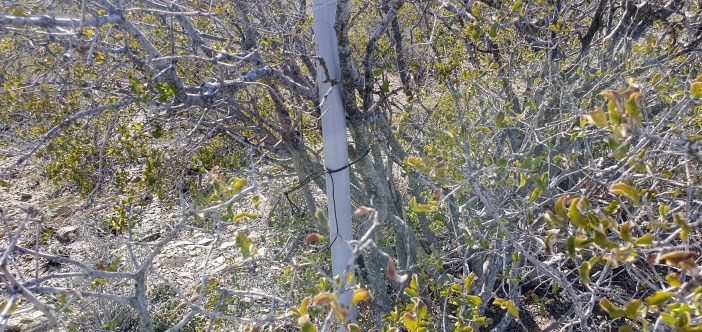
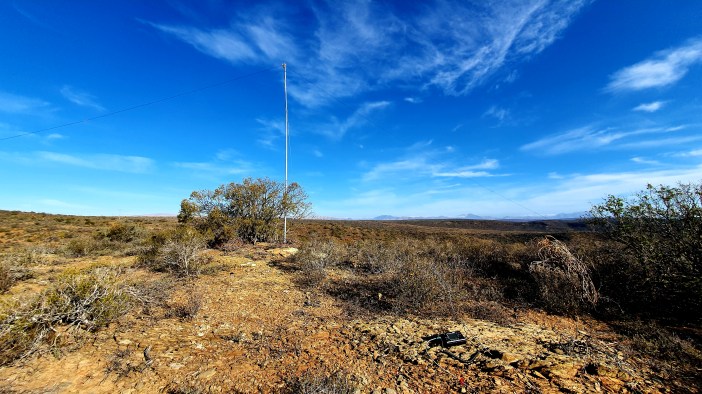
20190427_135740 (1).jpg

20190427_140605.jpg
Old Vs New

20190427_135759.jpg


Quick Field Trial

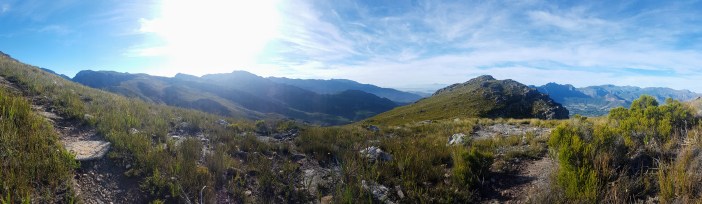
With minimal time, myself and Ohan ran out to one of my favourite spots in the DuToitskloof mountains to do a quick test of the QRP vertical and my portable Bundu Basher. An embarrassing secret is that I broke one of the top sections of my telescopic fibreglass mast while packing up at Klein-Drakenstein Kop.  (Moral of the story is don’t try and lever the entire antenna with your finger as the fulcrum) I already have a replacement section on the way, but it does mean that I don’t have a vertical mast that is the correct height for my QRP Triband, so I had to resort to wrapping the vertical wire around the mast to take up some of the extra length. That wrapping is obviously not identically reproducible and on this outing we struggled to get it resonant. The proper solution is to wait until I have the replacement mast section so that the vertical can be straight up and down, and then run my tests. Until then, anything I learn will be a once-off thing so I don’t want to waste my time.

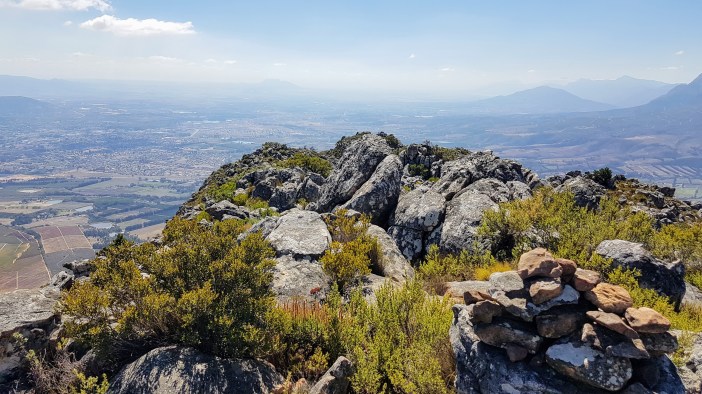
We turned our attention (and the limited time we had left) to the portable Bundu Basher which worked well. Some interesting findings regarding the feedpoint height, which makes me want to do a lot more tests before making any bold claims 😉

20190428_103600 (1).jpg

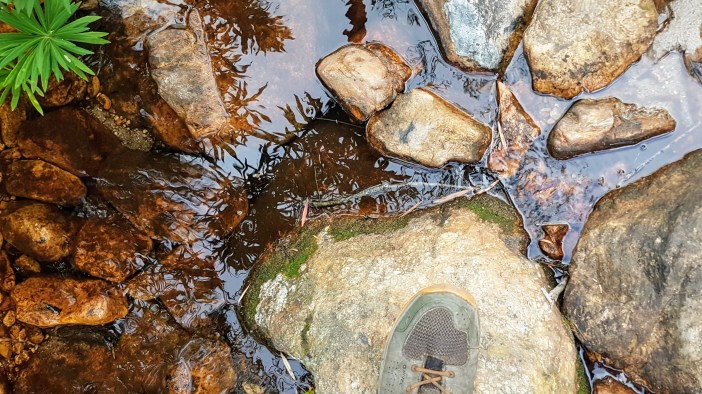
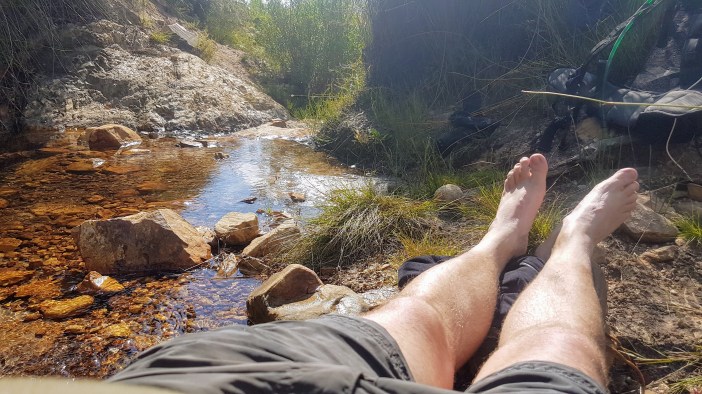
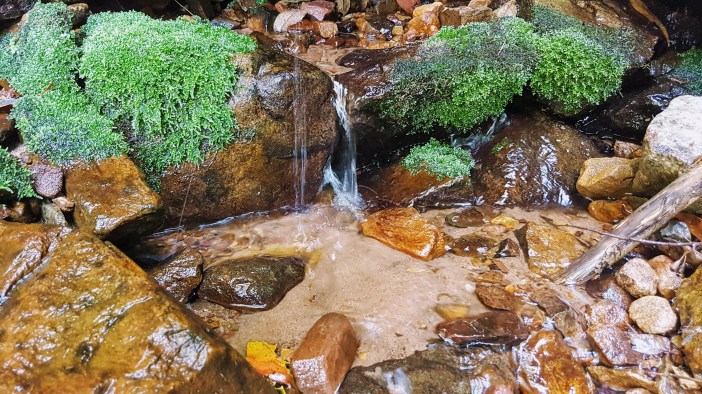
A weekend with the Bundu Basher Portable

A long weekend at the river and I had a lot of fun with the BBP. Just sharing the photo because it makes me happy.

20190501_171434.jpg


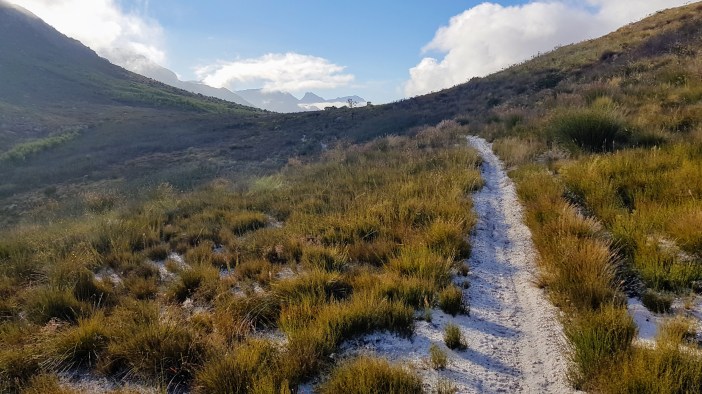
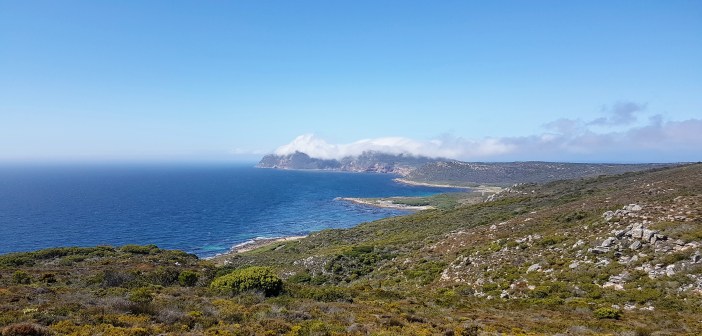
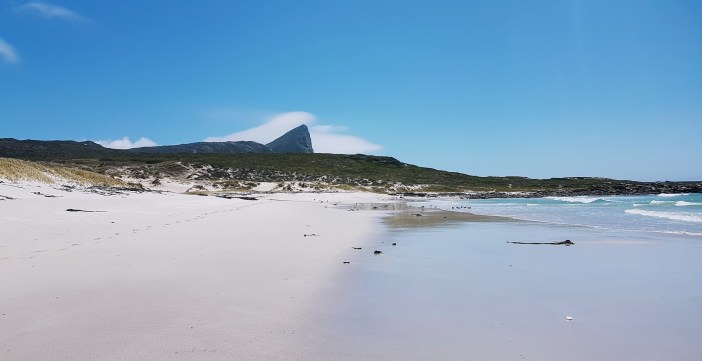
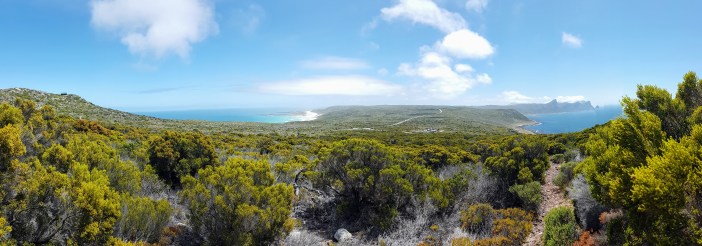
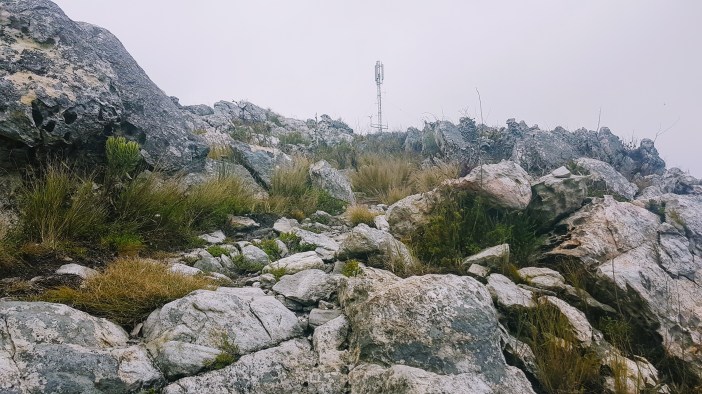
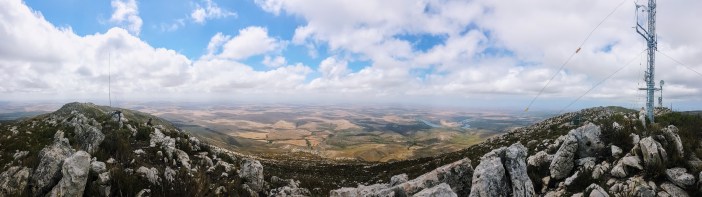
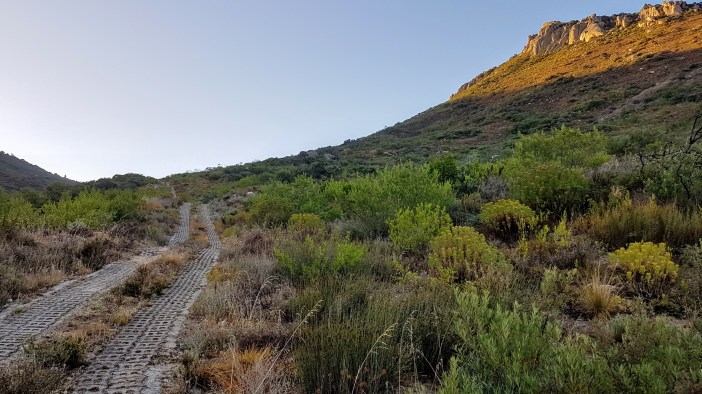
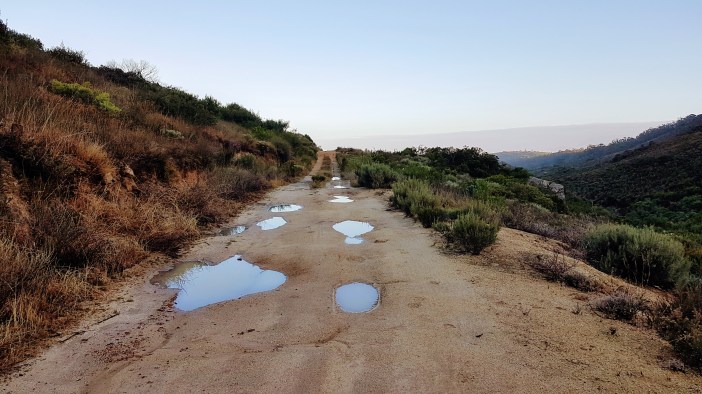
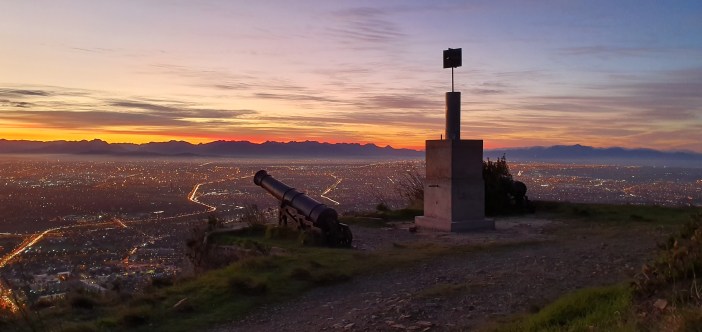
Miscellaneous Early Morning Walks

Taken over various days walking up to the Block House

20190513_072024 (1).jpg

20190513_070732.jpg

20190523_074141.jpg

20190530_212131.jpg

Chameleon Emcom III diagnosis?

Since my replacement, Emcom III was going to be stuck in South African Customs for between 4 weeks and 2 years, I figured I would open up the balun and see if there’s anything obviously wrong with it. One too many windings? A short? These things are built really well, but humans still make mistakes.

20190515_080526.jpg
Freshly opened. I’m assuming the grease is for heat dissipation and protection against water.

20190515_090425 (1).jpg

With all the grease removed it’s an interesting construction. And I would be lying if I said I understood it, or how to diagnose it. My current plan is to wait for the replacement and then buzz out all of the various contacts and resistances, compare the two units, and see if I can spot an issue. Anyone got any tips? The Chameleon guys have seen the photos but can’t spot anything.

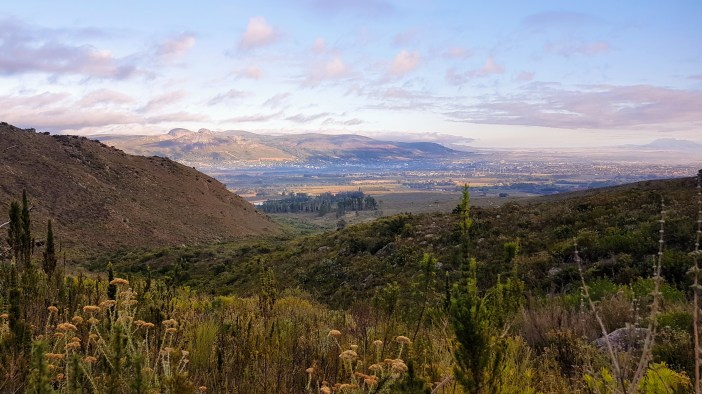
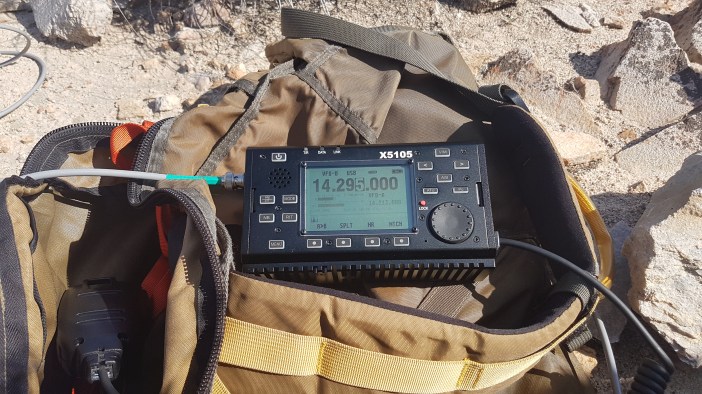
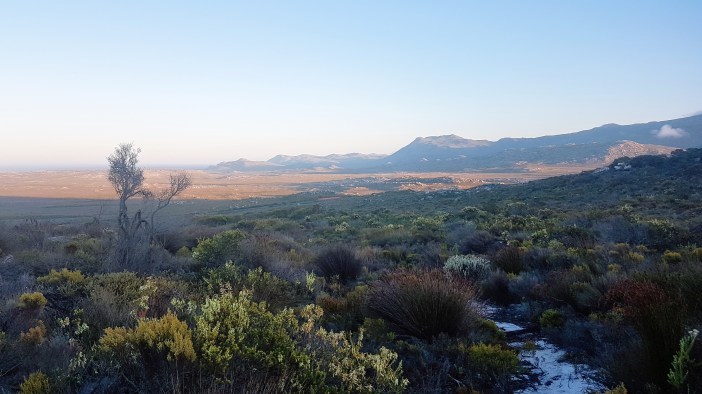
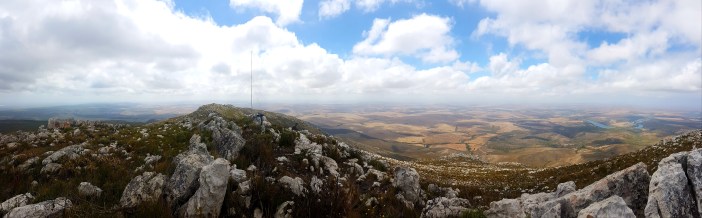
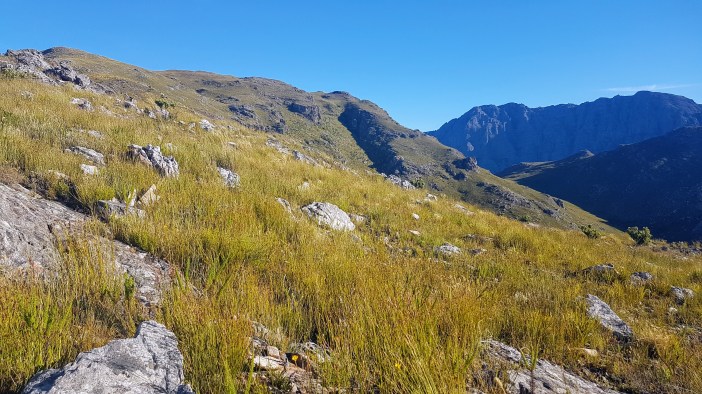
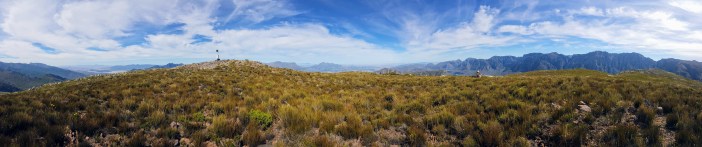
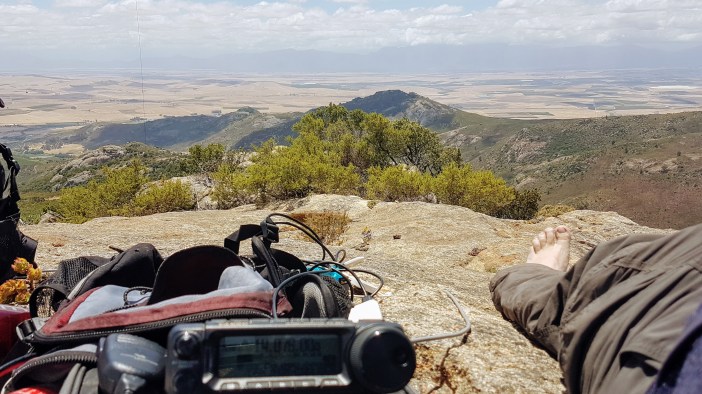
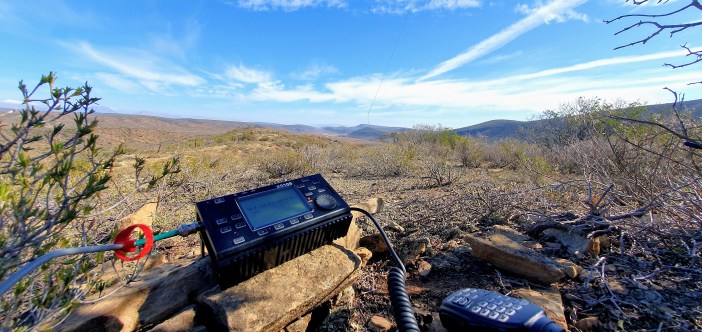
A long day in Oudtshoorn

20190518_115001 (1).jpg

While the wife was riding a 361km mountain bike race (mental), I took to the mountains to do some radio’ing. This was so fun. I drove as high up into the mountains as I could get, then hiked a short distance to the top of a little koppie where I set up using a small bush as my mast support. There was no wind, the sun wasn’t too hot, and my little Xiegu X5105 lasted over 5 hours at full power (5w). Through the day I made around 25 contacts, but it was incredibly fun spending what felt like the entire day chatting to people.  I helped some guys doing their RAE exams and blew some people’s minds when they heard I was QRP and 5/9+ over 1000km away.

20190518_104338.jpg
Sometimes nature just makes your life easy. This was the only thing keeping my mast up.

20190518_171030 (1).jpg

20190518_171140.jpg
Note the little Xiegu in the foreground


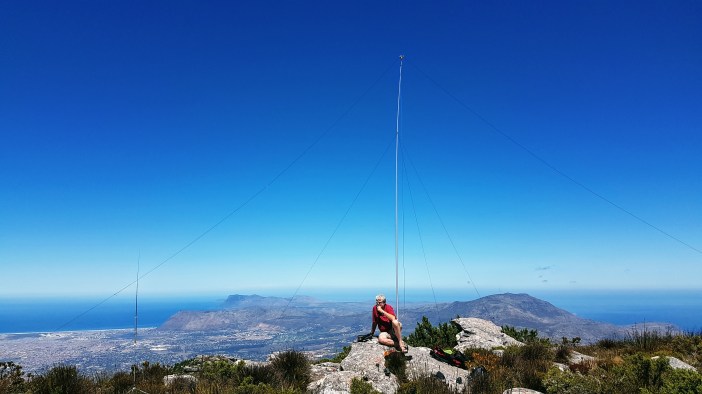
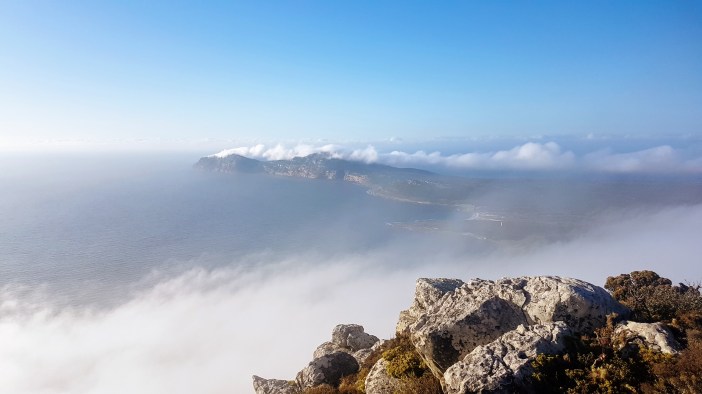
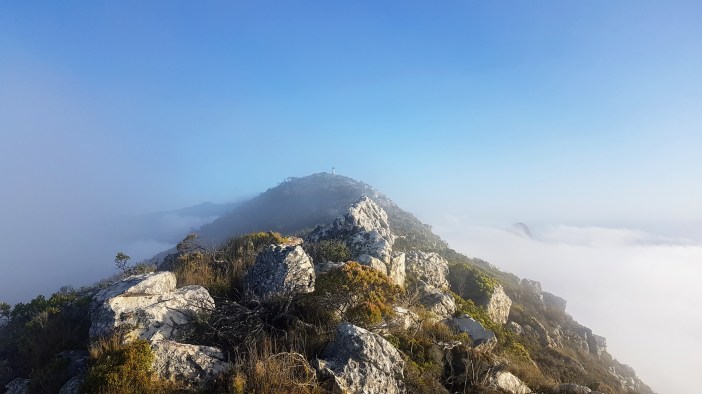
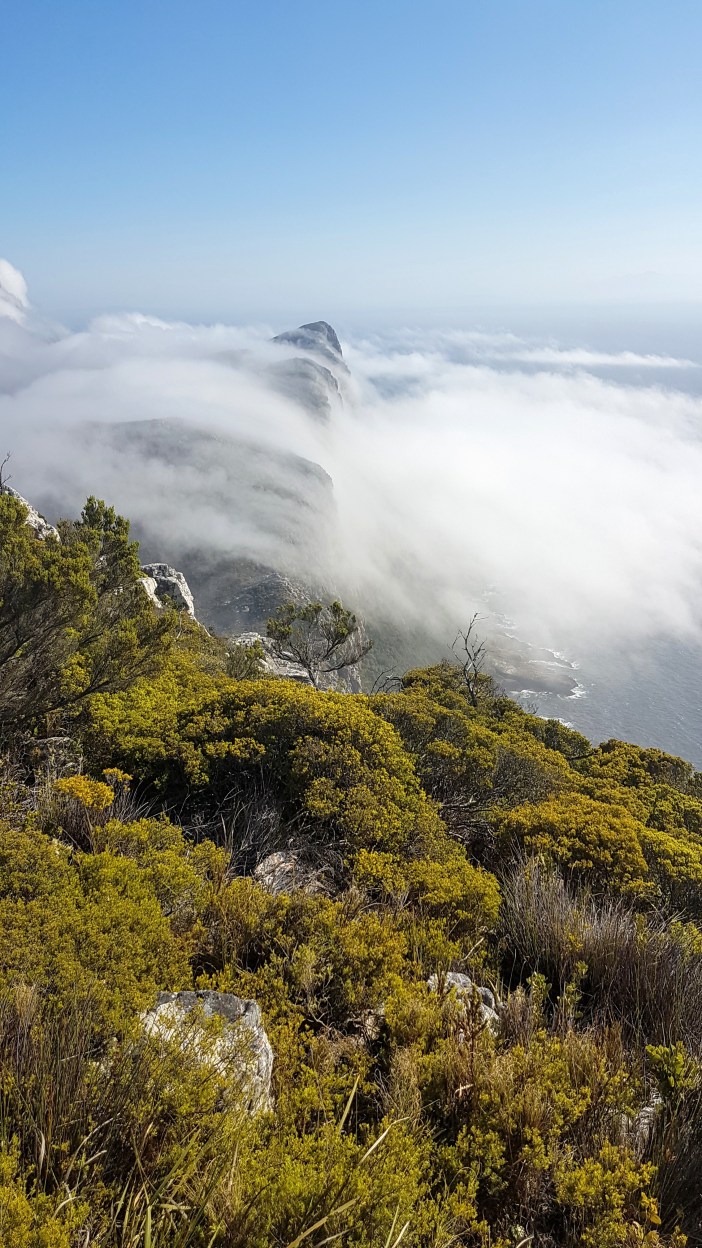
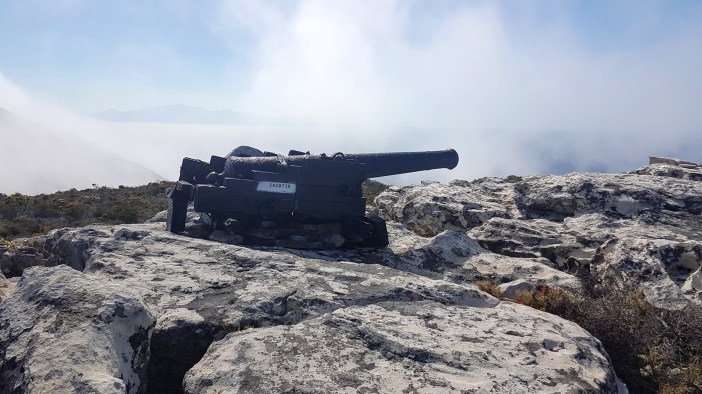
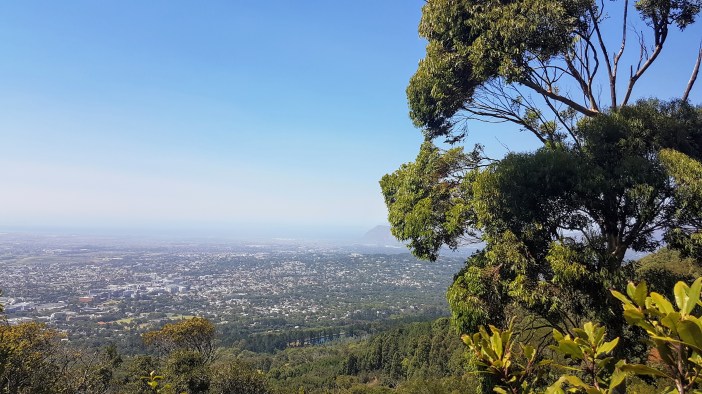
Eagles Nest, Table Mountain – Electrifying!

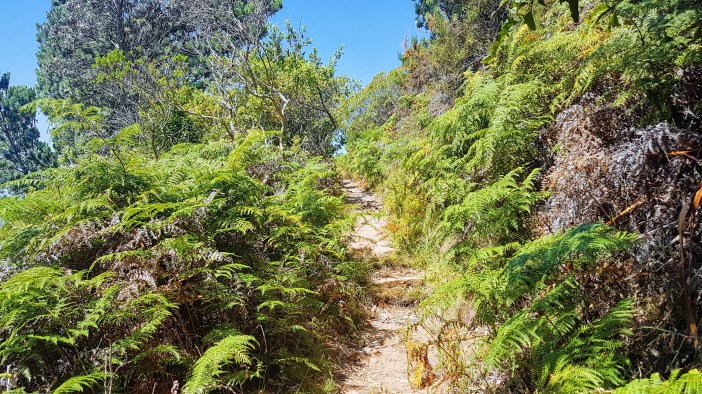
One of my most recent missions was a hike up to Eagles Nest from Constantia Neck. It’s a great hike and relatively easy as most of it is the jeep track.

20190526_094505.jpg

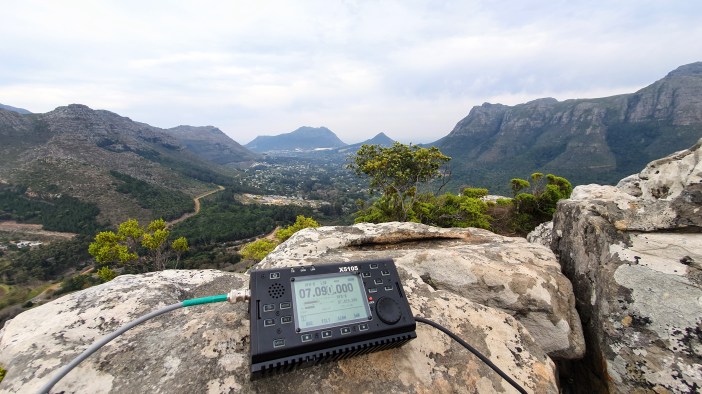
The weather on the day was weird. Very gusty, berg winds, hazy horizon. I struggled to get set up because of the high winds and eventually lowered my mast to about 4m so that it wasn’t bending so horribly in that wind. I was using my trusty inverted V and managed to make a few contacts but soon felt like packing up and moving to a new spot higher up the mountain. Before I could do that the weirdest thing happened. I started to hear some noise, like quiet crackling. The noise was coming from above me. I touched my radio and got a shock. Woah. That’s weird I thought. Must be static build up. I touched the radio again, ZAP. Twice a few seconds apart means I’m not dissipating the charge… It briefly starts raining, the noise gets louder and I realise that the entire length of coax is buzzing, crackling like tin foil in the microwave. Uh oh… I go to unplug the coax from the radio. ZAP… it’s not easy to disconnect a BNC when it’s constantly shocking you. Eventually, I get it off and drop it to the ground. It was still audibly buzzing while it lay there on a rock. A random hiker I had been talking to didn’t believe what he was seeing (I didn’t either) so he touched the BNC and got a shock too. So in a rush to not become a statistic I got my antenna down and packed up. Hence no photos of the antenna!

20190526_104453.jpg

As quickly as the weird weather started, it stopped. I hiked back down from Eagles Nest and then, rather than go home decided to explore some of the routes I’ve never been on, specifically the hike from Eagles Nest to Klassenkop which I hope to do soon.

20190526_104529 (1).jpg

20190526_105700.jpg

20190526_111130.jpg

20190526_111332.jpg

Cheers and thanks for reading!

016 – Klein-Drakensteinkop (17.5km, 950m Elev)

Most often my hike planning consists of me frantically scrolling through Google Earth on a Friday morning looking for an interesting summit that’s in the Goldilocks zone of my abilities. Something less than 15km and around 800m elevation. Often this is heavily influenced by whether the summit is a SOTA summit.

20190330_065721.jpg

Klein-Drakensteinkop kind of fell into my lap. I was looking for hikes around the Wemmershoek Dam (that I still want to go explore with plenty of summits to bag) and Klein-Drakensteinkop stood out because it looked like it had a nice set of trails to explore. I mapped it out by drawing the route in Google Earth. 8km each way and 900m elevation gain. This would be the longest hike and most elevation I’d done since I was a teenager. (Turns out it was longer with more elevation)

20190330_070255.jpg

With all the bravado of a mid-life crisis I decided I was going to go for it. I emailed the farm I’d identified as having access to the trail head. (There are probably a few)

I got a call a few hours later from someone at the farm granting me permission to hike. They didn’t want the farm’s name mentioned as they stressed that my approval was strictly a once off thing and they don’t want to get hounded by others asking permission. Their wish, my command. Good people! Thank you.

20190330_073401.jpg
I’m heading to the top of that!

So it was official, the next morning I was going to set off on a hike that was roughly 20% more distance and elevation than my previous hikes over the last year. I think that’s perfectly reasonable as a progression, but obviously it was going to be tough. Tough is what makes us stronger.

Packing is always fun. I enjoy that I’ve got my kit down to the bare necessities. Everything has bags, things are labelled, everything has power-pole connectors. Neat and orderly. I even have a spreadsheet that details the various pack lists depending on what radios I’m taking, including how many grams each thing weighs. Nerds don’t die on mountains.

20190330_073644 (1).jpg

The plan was to take my Xiegu X5105 (5 watts QRP) radio along for this hike as it is smaller and lighter. So the rough list is: radio, telescopic mast, inverted V dipole antenna, coax cable, guying system for mast, tiny toolbag, emergency dry bag (first aid etc), waterproof tarp (shade), torch, USB power banks, walky talky, water, food, spare socks.

The last thing I did before bed was load the route I’d drawn in Google Earth into my phone to use it with Locus (an amazing mapping and navigation app for Android).

20190330_074155.jpg

I set off early the next morning – I was hiking at 6:30. Sunrise was at 6:55 but there’s generally enough light to start hiking half an hour before. There’s a long and quite pretty walk through the farm’s property, past vineyards and down the farm roads that wind towards the mountain.

20190330_082023 (1).jpg

Soon the farm roads change into rough trails through vegetation where the path tends to peter out every so often. Occasionally you need to do some scouting to find where that trail goes. This is where I was very happy to have a pre-planned route on my phone with Locus. At every ambiguous point on the trail I would refer to the map and see which route made sense, or which direction I was meant to be heading in. Obviously this is achievable with a GPS, but the old Garmin I have is sloooow and doesn’t have a built in magnetic compass, so while it’s good for big-scale navigation, it’s not the best for the small stuff.

20190330_085840.jpg

Eventually the small trails I had taken broke out onto larger, clearly defined trails that wind their way up the valley crisscrossing the river every few minutes until eventually the river goes subterranean, but not before one last beautiful water spot with small pools about the size of a bathtub that you could “swim” in if you were so inclined.

Finally you crest onto the saddle between Vaalkop and Klein-Drakensteinkop. The area has a “great plains” feel to it and is deceptively flat compared to what the maps would indicate. Unfortunately some motocross riders have turned this area into a playground which damages the paths badly. Obviously as a biker I don’t begrudge people’s hobbies, but I think they need to stay off the hiking trails.

20190330_090418.jpg

Once on the saddle the trail winds, ever upwards, towards the East as you start to circle the back of the Klein-Drakensteinkop mountain. The Wemershoek dam begins to peak out behind the distant ranges. On your left the mountain looms steeply and disappears into the distance as there’s no clear line of sight to the summit, leaving you to simply trust that your maps aren’t lying to you.

20190330_090903.jpg

In the North-East corner of your circumnavigation you will find a small trail that heads, almost directly up the mountain. At this point you’re about 400m elevation gain from the summit, but with 2.5km left to hike. The route up is tough with loose rocks that sap your energy. Luckily the view makes up for it… As you ascend the Wemershoek Dam comes into full view and in the distance the Berg River Dam pops out and you realise you’re looking into the Franschoek valley.

20190330_091406.jpg
anti-mountain-bike-devices?

The route up takes you via a minor peak called “Spitskop” and then down into a little valley and up again for the final ascent to Klein-Drakensteinkop. This is not to be confused with the other Spitskop that is less than 4km away. The more you spend time in the mountains of the Western Cape the more you’ll realise that no names are unique.

20190330_093747.jpg

I found this last part of the hike very enjoyable. It’s very clear that you’re near the summit, the path is easy and while you’re still climbing, it’s at a pace that I find I’m able to walk while enjoying the scenery. (A far cry from the previous few km where I was shuffling uphill with my head down watching rocks)

20190330_102013.jpg
Nearing the top of Spitskop
20190330_102529.jpg
Finally the actual summit in the distance.

Finally the Summit! It’s quite flat and spread out, so there’s no dramatic cliffs to fall off. A small rock cairn, that I regret not adding to, sits at a point that someone must have decided was the highest, although it would be tough to confirm with it being so flat.

20190330_110356 (1).jpg

There was no wind at all. I could hear music playing from one of the farms in the distance, probably more than 6km away. As always, I took a moment to share my sumitting with the people who track me and then scouted the area to figure out where best to set up. I didn’t feel the need to set up shade as the sun wasn’t too harsh, so I chose a spot on some large flat rocks near the edge so that I could lie down if I wanted to.

20190330_115941.jpg
Looking down into the Paarl Valley. (Paarl Rocks faint in the distance)

Got the mast set up, antenna run, coax, radio plugged in… Noise… I’ve talked before about how one of the reasons I hike with a radio is because when you’re away from all the electronics of civilisation the RF noise-floor drops to almost nothing. This is great for radio as you’re able to hear fainter signals. Now, occasionally the sun at the centre of our solar system does some crazy stuff that creates background noise everywhere. It might last for a few hours or sometimes days and it’ll usually be worse during the day. I reached the summit at 11am… the stars were aligned to make this difficult, but definitely not impossible.

20190330_124334.jpg

I started calling on a pre-agreed frequency (7.090MHz) to see if any of the other amateur radio nerds who participate in this crazy hobby were able to hear me. Immediately I got an reply from ZS4CGR, one of my regulars from the Free State, over 700 km away. Again, it’s important to highlight that this radio uses about half the power of an energy saving light bulb. A few minutes later I was speaking with ZS6UT who is 1,280 km away. Then it was time for two locals ZS1OB and ZS1MTB (both less than 30km away) and finally ZS2AL (600 km away). ZS2AL asked the same question I would ask: “How many watts?” since “QRP” has begun to mean vastly different things. I love the question.

20190330_125311.jpg

I played around with my walky talky and spoke to a few people around the greater Cape Town/Paarl area, which is always nice to do because gives you a good sense of what your range is if you need that radio in an emergency.

20190330_133718.jpg

Eventually it was time to pack up. I had committed to the farm to being down by 3pm, and that deadline was rapidly looking unrealistic, which was irresponsible and made me feel bad. I wrote a quick email to the person who had given me permission and pushed out my return by an hour thinking that would be more than enough.

20190330_125141.jpg
Looking towards Hugenot Peak.

The climb down was tougher than the climb up. On the way up one of my boot lace holder things had broken, which meant I couldn’t tighten it properly (on the foot that has the most issues). This didn’t bother me too much on the way up, but coming down it was starting to hurt, and the weird way I had to lace my shoe was making my foot chafe in new and exciting places. I’m starting to learn that descents are often tougher than the ascents and if you add blisters to the mix you slow right down to a hobble even if you’re rushing to meet your curfew. The steep paths with millions of loose stones are effectively ball bearings under your feet so you’ve got to be careful.

20190330_133845.jpg
The route home via Spitskop. Note Wemershoek dam and Berg River Dam in the top right.

The hike down was mostly uneventful. The nicest river spot is conveniently at about the halfway point, and despite my deadline I decided it was wise to take a break and get my feet in the water and change my socks (I’ve started carrying a spare pair of socks). The first couple of steps after the numbing ice-bath with the new socks was a bit painful, but soon I felt a better and possibly even sped up. One small bit of excitement was that my phone overheated (probably because I’d been charging it constantly) and stopped turning on. I used my HT (walky talky) to ask a friend to call my wife and let her know that everything was fine and that I might not be in contact until I got home. See, responsible! The phone started working again a while later but highlighted the fact that I should have had my old trusty GPS in my backpack with the same route loaded in.

20190330_150805.jpg

The last slog through the wine farms was flat and seemed much longer than it did in the morning. When I got to the car I threw my stuff in the back and with tender feet, and very thankful for an automatic, drove to the security boom where the guard and I chatted briefly. “Where did you go?” has asked. “Up there“, “WHAT? To the top?“, “Yes! It was quite tough“. I loved that.

20190330_164150.jpg

Summary

Date: 30 March 2019
Distance and Elevation: 17.5km and 950m Elevation Gain.
Coordinates: Somehow get yourself to here and then follow the trail up to the summit.
Conditions: Lovely day. Slightly misty in the morning and then very calm during the day. I reapplied sunscreen a few times.
Radio Stuff: You’ll need a telescopic mast. On the day the bands were in pretty bad shape, but I’m pretty sure none of that was local.
Notes: This is a long hike, take lots of water. You’ll be away from the river for ~10km of hiking so don’t assume “oh there’s a river we’ll be fine“.

015 – A QRP micro-mission in Montagu (2km / 150m elevation)

The wife took part in a crazy 155km gravel race in Montagu that almost everyone dropped out of due to the 42 degree heat, but her and three others finished. #machine

20190317_102432.jpg

I took the morning after as an opportunity to run up the little mountain behind the place we were staying (actually my parent’s new house) and try out my new QRP radio.

The radio is the Xiegu X5105. It’s small, solid and feels like it was built by nerds who love engineering. You can literally fit this radio into a large pocket, and it is fully featured: Built-in battery, built-in antenna tuner, it even has a built-in mic so that you don’t have to carry the handheld mic.

20190317_092648.jpg

I’d only ever used it once before, very briefly in a forest with a hastily strung up antenna in some trees, and that worked amazingly so I had high hopes.

QRP refers to transmitting at low power while attempting to maximise your effective range. “Normal” ham radios are 100 watts, QRP radios are usually (traditionally) 5 watts or less. That definition has become a bit blurry over the last few years with 15 watt radios being considered QRP. The purists will say 5 watts is the only true QRP. On the other end of the spectrum, there are quite a few hams with 3000 watt amplifiers.

20190317_090637.jpg
On the way up the hill

Back to Montagu, there isn’t really a path to the “summit” but I’ve explored the area before and knew a route. Follow the fence-line up the hill and then when you reach the top, turn left and traverse the spine of the mountain up to the highest point. In total it’s probably a 20 minute hike with no real paths, but easy terrain.

20190317_190822.jpg

At the top is a small rock cairn and a relatively large area to set up antennas etc. It’s quite exposed as winds blow through the valley behind, get compressed and explode over the cliff and into your face.

I’ve been learning some tricks for setting up in high winds. The two most important ones are:

  1. Keep the mast bent a little in one direction so that it doesn’t flap around.
  2. Rake your dipole legs back into the wind to give your mast extra protection/rigidity in the wind.
20190317_110642.jpg
Note how the mast and dipole legs are raked back into the wind.

So, how did my 5 watts perform?

Firstly, I was in a rush. If I had more time I would have set up a little shady spot and probably made a lot more contacts. That said, I did make multiple 5/9 contacts with stations in Johannesburg and Pretoria, over 1100km (680 miles) away. To achieve this with 5 watts (the power your average phone charger puts out) is incredible.

5/9 is an “RST report” (Readability, Strength and Tone). For voice communications we only report the R and S part, as Tone is important only to Morse code operators. 5/9 is pretty much the best report you can get. There is also 5/9+ and 5/9++ but that’s really just saying “Your signal is so strong my radio can’t measure it accurately”.

So 5/9 means:

  • 5 out of 5 for Readability. (ie. They can make out what I’m saying with no problems)
  • 9 out of 9 for Strength means a very strong signal.

The fact that RST reports are often written in way that makes them look like a fraction (eg. 5/9) is not helpful to people who are just learning about this stuff. It’s not a fraction.

So in summary, I’m a huge fan of this little radio. I will do another more in depth review on it at a later date, specifically with regards to its shortcomings for portable operations on digital modes (which might be fixable with firmware updates from Xiegu).

This does also reconfirm the age old tenet that “It’s all about the antenna“, which should really be: “It’s all about the location and the antenna“. The combination of a great antenna and good location will outperform the most expensive radio every day of the week.

I really do look forward to camping out somewhere in the mountains with my little Xiegu and a tent!

20190317_110520.jpg
Tip for the home gamers: you can use these winders as adjustable guy fasteners, but this only stays tight under pressure. If you drop your mast to change a link dipole this will likely come completely loose.
20190317_110529.jpg
There are HUYGE ants up there.

Summary

Date: 17 March 2019
Distance and Elevation: 2km and 150m Elevation Gain.
Coordinates: Starting point is on a gravel road just behind some houses. Head up the fence line to where you’re at the base of the spine and then head straight up to the rock cairn.
Conditions: Windy but warm and exposed. Wear sunscreen!
Radio Stuff: This is a great spot for testing out kit if you’re new to portable ops and don’t want to hike too far only to discover that you forgot a random connector. If you’re in Montagu for a weekend etc, take Sunday morning to disappear into the mountains.

map.png
The route up. As you can see, you’re not too far from houses but it’s relatively RF quiet up here.

Bonus photos from my previous mission with the X5105 in Newlands Forest

20190309_085506.jpg

20190309_100927.jpg

20190309_123539.jpg

20190316_170500(0).jpg
And a picture of the wife after finishing the race on her semi-vintage gravel monster.

014 – Table Mountain (5km Micro-mission to Maclear’s Beacon)

Back at Cape Infanta I chatted with Dieter in Australia who introduced me to Charly, a German ham who was about to set off on an adventure through Southern Africa and wanted to do some radioing on top of Table Mountain. This had been on my list for a while so it was perfect timing.

20190224_080127.jpg

We met up early to head to the lower cable car station, got into the first car up and then began the 2.5km hike across the top of the mountain to Maclear’s Beacon. We were not mad enough to try hike up with full packs!

20190224_090003.jpg

I really enjoy the little hike to Maclear’s Beacon. You get to see the city (and the reservoirs etc) from a perspective that most people who only loiter around at the Upper Cable Car Station will never see, and it’s not much more than a 30 minutes walk. There’s one slightly strenuous part as you dip into the small valley at the summit of Platteklip Gorge, but otherwise it’s mostly flat.

20190224_151222.jpg

The mountain was showing off Peak-Cape-Town-Weather as it undulated between heavy mist and sunshine 5 minutes later. We arrived at Maclears which is always quite busy with tourists bussing around so we decided to setup our antennas a short distance away, hopefully out of the way.

20190224_144103 (1).jpg

My Inverted-V antenna proved a champ once again as it allowed us to speak to hams all over the South Africa and Namibia, including some QRP to QRP contacts using Charly’s Elecraft KX3 (the Mercedes Benz of low power hiking radios).

20190224_102350.jpg

20190224_124611.jpg

Maclear’s Beacon is also a SOTA summit so I made the required HF and 2m contacts and Charly even managed to make a few contacts via a Amateur Radio satellite as it passed overhead.

20190224_160859.jpg

Summary

Date: 24 February 2019
Distance and Elevation: 5km and 100m Elevation Gain.
Coordinates: Park or Uber to the lower cable car station, take the ride up, then hike across to Maclear’s Beacon.
Conditions: Cool with occasional mist. The weather on top of the mountain can be vastly different from the weather in the city, so be prepared for freezing cold.
Radio Stuff: I would advise taking your own mast. There are no trees and you are unlikely to be able to use the actual beacon as it is usually covered in tourists.
Notes: A fun day out that I can highly recommend to anyone who wants to experiment with their radio in the field from a stunning location.

013 – Miaspoort Trail to Hugenot Tunnel Survey Beacon (10.7km / 800m Elev)

Let me begin by saying that this was a bad idea. I had decided to climb a mountain and then hike to a survey beacon with no paths to it, alone, on a day with heavy fog. Everything turned out fine in the end, but if you’re reading this there are probably some lessons you can learn the easy way.

20190216_055835.jpg

I started hiking at 5:58am when there was just enough light to make out the next 10 meters in front of me, and since there was a well defined trail, this part was relatively easy.

20190216_060134.jpg

The Miaspoort Trail is not in great condition, there are sections that have been damaged badly by erosion and never repaired. Most of my photos from the first bit are moody fog photos. I generally don’t mind hiking in fog, but you’ll see later in this post why it can be a problem in certain circumstances.

20190216_062626(0).jpg

The hike up is a rather brutal 1.5km with 500m elevation on not-the-best path, but I did it and got to the top in just under two hours. That’s the kind of pace I push uphill with plenty of stops to catch my breath look at the wonderful view, or fog.

20190216_072900_014.jpg

20190216_063122.jpg

At the “summit” of the Miaspoort trail you have two options:

Option One: turn right and curve around the back of the buttress and up to the Hugenot Peak and the Italian Cross, a gigantic steel cross which is a memorial to the Italian Prisoners of War who died while building the Hugenot Pass. This is an additional 377m elevation over 1.5km, so slightly easier than the half.

Option Two: turn left and take the road less traveled. There are no paths or routes here, I can’t emphasise this enough. Before setting off I had spent a fair amount of time on Google earth and other mapping platforms scouting the terrain. It looked relatively inviting. A flat plain that would be easily traversable. In reality it was a rough and undulating rocky hell. Thick bush, often at chest height and the necessity to be boulder hopping while unable to see where you were landing meant that every step could be the one where your foot disappeared into a hole. The mist made it difficult to see further than a few meters ahead, which made planning my routing even more tricky.

20190216_080230.jpg

Mistake 1. Hiking an off-trail route by yourself is not smart. I had emergency contacts who knew where I was and where I was going and the specific route, and even live GPS tracking. I have no doubt that they would definitely have been able to find my body.

Mistake 2. Not planning my actual traverse beforehand and instead ended up just using the GPS bearing to head to the beacon. I’m lucky that I have a fair amount of orienteering experience, both from hiking courses and from sailing, but I had assumed that on the day I would be able to get to some higher ground and plan my traverse visually. The fog made everything impossible. I didn’t have any points of reference (ie. a huge peak in the distance to keep to my left etc).

Mistake 3. Not realising that a direct-to-the-beacon GPS route would take me over numerous cliffs. This one is a bit trickier to plan for beforehand because maps struggle to give you the context of what is impassable. I can’t jump down a 3m cliff, but on a map that cliff doesn’t even exist. What I should have known is that the direct route would take me very near the cliff faces and that terrain in general might be difficult to traverse. Schoolboy error.

20190216_082539.jpg

So in the fog of war I trusted my trusty GPS and compass to head in a straight line to the beacon that was 1.5km away. This resulted clambering though thick bush, uphill, over rocks for a quite a long time, only to discover that I was at a cliff face that dropped spectacularly hundreds of meters down to the bottom of the mountain. Idiot. Thick fog meant that I still could not see where the cliff ended (or even the other side of it) so I just had to start traversing the top of the cliff to get “around” it. This meant climbing back downhill a lot, still bundu bashing through thick bush and sometimes climbing up or down small faces with a 15kg pack on my back.

20190216_082607.jpg

Eventually I was at the neck (most inland point) of the cliff. Only 800m left to go in a straight line up to the survey beacon. A some point I had slipped on the wet-from-fog rocks and with my full weight, slammed my shin into a rock. This was bleeding and the bundu-bashing was now constantly scraping thorns over the wound. Uphill, climbing, jumping, slipping, drudging up and up, Half a league, half a league, Half a league onward into the foggy darkness. This was not really fun any more. Only 500m to go.

20190216_083237.jpg

20190216_083252.jpg

20190216_091856.jpg
A story in two parts. Look closely.
20190216_091856 (1).jpg
Zoomed in, across the valley, is the beacon in the mist.

I found myself standing at the edge of another utterly spectacular cliff with fog being blasted up by the wind. I could not see the other side, but far in the distance, 400m away, when the mist cleared just enough, I could see what looked like a trig beacon… and a bottomless pit of fog between us. Normally in life I would have lost my composure at this point, but when you’re alone and your life really does depend on it, you tend to process things differently. I was utterly exhausted, but I knew what I had to do. Start heading back downhill, traverse the cliff and hopefully on the other side there’s a direct line to the summit.

20190216_085055.jpg

It’s at this point that I realised another important lesson. It’s very easy to gauge distance while hiking if you can see everything for a few kilometers, but when you add fog things become terribly disorienting. Could there be another cliff between me and the summit if there is only 300m to the summit? How far have I walked now? Which direction did I even come from? Why does every cliff look the same? Without a GPS and/or compass I sincerely believe that even an experienced mountaineer could get themselves lost up here.

20190216_085447.jpg

Finally through the mist I saw the outline of what must be the summit. I tempered my enthusiasm, keeping myself prepared for the likelihood of some additional drama that would force me off course again, but as I climbed the fog dispersed and it became more and more clear that the summit was indeed just a few more hundred meters uphill from me. And then eventually, the site that hikers love, the survey beacon. It had taken me an additional 2 hours to hike the 1.5km from the “summit” of the Miaspoort Trail to the survey beacon. It was meant to be “relatively flat”, 20 minutes maybe.

20190216_095047.jpg

20190216_095127.jpg

20190216_105222.jpg

20190216_105503.jpg

20190216_105547_patched.jpg

The view was obviously spectacular. I was on top of the world, and in one direction all I could see for hundreds of kilometres was the top of the most perfect field of white clouds. It was the kind of view reserved for Boeing pilots, but now I had it all to myself.

I took a few moments to collect my thoughts and congratulate myself on getting to the top, but the concern I had for the decent was already starting to weigh on me. I decided to set that aside momentarily and enjoy my time at the summit.

How to set up a portable radio station:

  • Step 1. Get the 7m telescopic mast extended and resting on the ground.
  • Step 2. Unravel the linked dipole antenna and affix it to the top of the mast.
  • Step 3. Connect the coax cable to the antenna and tape it to the mast. If it’s windy, tape all the joints to help stop collapsing.
  • Step 4. Lift the whole assembly up next to the survey beacon, wrap the beacon and mast with the orange straps and jam something soft in between the two to stop it the mast from getting scratched too badly.
  • Step 5. Extend the dipole legs with cord on two winders, find a rock or tie it off to a tree. You want a 90 degree or more angle at the apex.
  • Step 6. Get out the radio, connect up the power and start tuning around to see if you can hear something. Key the mic on CW at low power to check your SWR and make sure everything is working correctly.
  • Step 7. Try and find a shady spot to sit in, this often means super uncomfortable, but slightly more protected.

20190216_114121.jpg

Everything was working perfectly so I started seeing who I could reach out to. Within a few minutes I had made a bunch of contacts all across Southern Africa. It was almost too easy. I took out my “walky talky” (Hams call this an HT) and called out on 145.500 to see who was listening. Incredibly I was able to chat to people all over Cape Town, Paarl, Malmesbury, Stellenbosch, Durbanville etc. Height really helps, and the dense cloud cover didn’t seem to make much difference.

20190216_113634.jpg
My messy setup.

Based on the timestamps from my photos I had spent less than an hour playing with radios. This is quick and in hindsight it was incredibly wise. By 12:25 I had packed up and was heading back down. It had taken just over 4 hours to get to the summit, and normally decent would take 75% of that time. I would have hoped that my slightly more informed familiarity with the terrain would make it even faster since I wouldn’t go on any stupid detours, so maybe as quick as two hours if I was lucky. But another reality was starting to show itself; exhaustion. I was tired and sore and a little bit nervous. My legs weren’t as nimble as I would have liked them to be. It was trying to plan a better route back to the trail but much of my planning felt like it was resulting in even tougher hiking (at which point you start to doubt your cognitive agility).

20190216_122644.jpg
The mist creeping back in

I won’t give you the Charge of the Light Brigade version, but I will say that it was tough and there were some times where, even with better visibility and a “plan”, I still had to double back on myself. I lost my compass (a cheap one, but still) and relying on the GPS’s compass (which requires you to move in a straight line in order for it to calculate direction, when you’re clambering over rocks and bashing through bushes) is not easy. Eventually I found myself below the point that was the “summit” of the Miaspoort trail, I was exhausted, battered and bruised. I scrambled up still wondering if this was really the right set of rocks. That first sight of actual established, well worn path was a huge relief.

20190216_135618.jpg
Looking down the Miaspoort Trail as the mist begins to clear.

Without ever having experienced something like this you probably can not appreciate the cognitive load that one takes on when exploring without a trail. The trail is an auto-pilot. You just need to put one foot in front of the other… It is basically free energy. Take the trail away and you add the cognitive stress of planning and re-planning (which drains energy) AND the inefficiency of hiking through rough terrain (which drains energy) AND occasionally needing to double back, extending your total distance unnecessarily (which drains energy). The trail is a salvation experience. It is miraculous. I can imagine the ecstasy experienced by explorers thousands of years ago when finding a well worn trail.

The steep 500 meters of elevation descent was brutal because I was exhausted. My legs were jelly, the sun had decided to bake down and the wind was nowhere to be seen. I took a few steps, gathered my composure and gave my blisters a few moments of zen, and then took a few more steps. Repeat.

20190216_140626.jpg

It was brutal at this pace, the longer you hang out in the sun the worse you’re doing. I found a small crook in the path partly covered by bushes. I had time and I wanted to rest so I pulled myself and my pack into the gap to enjoy the shade for a few minutes. A few minutes later a young couple come bounding down the path. They were moving so quickly that they almost didn’t see me. I said “Hello!” in as friendly a manner as possible so as not to startle them. They asked if I was okay, I said yup, just taking it easy, and then they bounded off.

I want to get myself fitter and stronger. I’ll probably never be quite as fast as the 24 year olds that sprint past me, but I believe that the body is capable of incredible transformations if you put the work in. I want these kinds of hikes to be doable without questioning my sanity. Ryan Sands just did 13 peaks, 100km and 6000m of elevation in less than 24 hours. At what point do we rise up against these mutants?

20190216_151346.jpg

Near to the bottom of the Miaspoort trail is a small shaded river crossing. If you’ve been reading my blog you’ll know how I feel about rivers and embracing them at every occasion. I sat there for quite a while, pouring water over myself, enjoying the shade and soaking my battered feet in the water. I’ll spare you the detailed photos of my feet.

From the river it was just a short distance to the car. I still stopped to sit on a rock for a moment. It was now over 10 hours that I had been hiking, and starting to realise that I didn’t consume enough actual food. Another important lesson learnt. Force yourself to eat because by the time your body is exhausted you won’t really feel like eating.

The last bit was really just a zombie slog to the car. I had to walk along the highway for a short distance to get back to the car, and I’m sure passers-by must have thought I was a broken weirdo walking from city to city. I got to the car, shoved my pack into the back, started the engine to give the air conditioning a head start, then settled into a very weird drive home. Turned the music up loud and spent an hour feeling utterly great. Got home, showered, dressed my blisters and headed out to dinner with some friends. I think I was running on delirium by that stage.

20190216_160419.jpg
The pointy sticky out bit top left is where I was. (notice the mist is gone)

Overall this hike was, in hindsight, fun. I see it now as a metric of my abilities. I want to be able to go back and do everything right, be stronger and fitter and get to the summit without hurting myself or doubting my sanity, and then get back down non-stop. So now the question is how do I get myself there?

Summary

Date: 16 February 2019
Distance and Elevation: 10.7km and 800m Elevation Gain.
Total Time: 10h14m
Coordinates: Parking spot Trail Head Trail Summit Survey Beacon
Conditions: Thick fog, very low visibility, very hot when the sun came out.
Radio Stuff: The survey beacon is well positioned for a mast. There’s not really anywhere to get any shade, so if you plan on staying for a while you should pack a tarp.
Notes: We grow from our mistakes.

012 – Cape Point (Paulsberg & Vasco da Gama Peak) 14.5km 540m Elev

It is ironic that I never really thought of Cape Point as a hiking destination. It has always been the place where your friends from overseas go on the day you’re not playing tour guide.

20190209_064347.jpg

It was the two SOTA summits inside the reserve, tantalisingly close to each other, that convinced me to go for it. This would be the longest hike since I left my 20s, and I planned it with two cars so that we would have an easy out before the second summit if we decided to bail early.

20190209_070309.jpg

My hiking companion StJohn and I made sure we were the first people at the reserve gate at 6am when the main gates opened. We dropped off one car at the base of Vasco da Gama peak and then backtracked with the other car to the parking spot nearest Paulsberg.

Paulsberg (368m)

It was misty and windy but the hiking was good. We trundled over the gentle hill that separates the road and Paulsberg, and then started climbing up to the summit. The wind was picking up, and as we ascended the view behind us would be wiped away by walls of mist and then occasionally clear enough for us to get a sense of our progress uphill.

20190209_072557.jpg

The summit of Paulsberg is roughly 210m elevation above the parking spot. We’d covered the first 100m of elevation over the previous 1.5km, but now with less than 500m of distance you’re gaining 110m of elevation. It is steep but not unmanageable if you pace yourself.

The wind buffeted on. I wondered about the success of our antenna erecting abilities in the strong wind. The trail reaches the “top” about 100m South of the actual highest point, from there you scramble across the slight incline to the survey beacon. We took a few moments to assess the situation and plan our attack.

20190209_072618.jpg

I’ve subsequently realised that the approach I took to getting the antenna up was not ideal, and hopefully you can learn from my frustrations. Firstly I must highlight that the wind was strong and gusty. I imagine that the steep cliff-face played havoc with the wind direction and we seemed to be getting gusts from every direction.

What I did: Strapped the fully telescoped mast to the survey beacon and then tried to use the guy lines to keep it up straight while the wind buffetted it in every direction, tangling all the lines, having the mast de-telescope randomly and then having to reset over and over. It took ages and I was constantly worried that a gust would snap my expensive mast.

What I (think I) should have done: Get the mast up and use the legs of the inverted-v antenna to pull it over in one direction, preferably into the direction of the predominant gusts so that it is flexed into the wind (not away from it). This should, in theory give you much most stability, but yes your (flexible) mast will be bent and you do obviously run the risk of snapping it. The theory is that doing it this way reduces the risk of snapping because the mast is held in a static position. The other (theoretical) side effect is that you’ll have less de-telescoping because the side-loading should resist the mast sections slipping through each other. Did I mention that this is a theory?

20190209_084346.jpg

We eventually managed to get the antenna up and in the windy chaos got the required 4 contacts for SOTA. In the process I managed to lose my phone, find it again and then once we pulled the mast down realised that I didn’t have a single photo of the antenna in place. I felt relief to not have broken anything which is not a great feeling.

20190209_084648.jpg

We packed up, had some coffee, adventured to the edge of the crazy steep cliffs overlooking the sea and took some photos. This was just the first stop for the day.

20190209_084926.jpg

Descending Paulsberg was relatively quick, not easy, but quick. We joined up with the main path and started heading down the Bordjiesrif Trail which gradually takes you down to the sea. It’s a lovely walk and the weather cleared as we descended. It felt like summer by the time we stepped out onto the tarred road on the beachfront.

20190209_095823.jpg

I have this thing: I want to put my feet in the water. I feel like we go through life trying to keep our feet dry. I walked to the rocks, took off my shoes and socks and then gingerly hopped to a spot where I could sit with my feet in the ice cold water. Magic! My hiking buddy gave into the peer pressure and did it too. (yes, I’m sure there’s lots of reasons not to get your feet wet while hiking).

20190209_102945.jpg

20190209_105625.jpg

Once we had our shoes back on we started walking the beach road towards the next summit, Da Gama. This was a long stretch, but very flat and the groups of people swimming in the tidal pools and braai’ing next to their 4 person dome tents (that they set up for the braai, probably to keep granny out the sun) made the walk seem faster. They probably thought we were weird, hiking with our huge backpacks through their braai area!

20190209_112113.jpg

20190209_112501.jpg

About half way between the peaks we left the road and continue hugging the coastline. This wasn’t the easiest route to the base of Da Gama, but it was the prettiest… except for the months-old beached whale that I won’t be sharing a photo of.

20190209_112753.jpg

20190209_113231.jpg

20190209_113734.jpg

We eventually picked a spot to eat even though I generally don’t feel like eating on hikes but know I must. It was windy again and the gusts threatened to tsunamis in my coffee cup as I sipped away. We realised we had gone too far and needed to double back a bit to to get back to the trail we needed to be on. A few minutes of bundu bashing uphill and we were back on the right trail. We skirted the steep cliffs that crash into the sea and form the base of da Gama. If there was an inaccessible cave with hidden pirate treasure, it would be right here, including the “Danger Do Not Enter” signs.

20190209_124627.jpg

20190209_124523.jpg

20190209_121424.jpg

20190209_124454.jpg

We popped up off the trail right into the parking lot where we had parked our second car. (yay navigation skills). I didn’t let myself think too hard. My feet were aching. My right knee clicking with each step, the blisters on blisters on blisters from the last 12 weekends of hiking were begging for the luxury of the Volvo’s leather seats and air conditioning. I walked towards to Southern side of the parking lot looking for the trail that heads to the summit. Casually I ask StJohn “You’re good to to go? Right?” – I didn’t want him to over-analyse either. This wasn’t about “wanting to do something”, it was about finishing what we started.

Vasco Da Gamma Peak (250m)

The climb up Da Gama was slow. It’s a weird climb because it skirts the peak around the eastern side and often feels like you’re walking in the wrong direction. The weather would oscillate between zero wind and then an occasional breeze. We slogged up. The views looking back up the peninsula are spectacular. The Indian and Atlantic oceans choosing different colour schemes for the day. (It’s not because they’re different oceans, just local conditions, sometimes they look the same).

20190209_125946.jpg

As you get closer to the top you start to see derelict fence posts in the middle of nowhere. That alone is a bit spooky, but as you continue hiking you realise that there really is no actual trail to the summit, just fence posts that once very-seriously fenced off the entire top section of the peak. I had no idea what to expect up there (I didn’t do enough research) but I started to get the impression that it was going to be something related to the military and probably of WW2 era.

Eventually we realised that the only paths we could find led away from the summit, so the only thing left to do was to leave the path and scramble the last hundred meters up the hill. We made our way up, and then as you emerge onto the summit you see a series of very derelict cabins, and most notably a large concrete base about 5m square with rusted iron inserts that makes it look very much like it held up some sort of communications equipment. A beautiful coincidence that we would be there to play with radios.

20190209_133954.jpg

Subsequent research has taught me that this station was the Da Gama Radar Station, which was built in the early days of WW2 along with many others along South Africa’s coastlines in order to act as an early warning system for approaching enemy aircraft (as possibly ships). Frustratingly there are almost no photographs (online) of what these bases looked like, and I can’t not find any photos of this particular base from when it was still operational. I’m sure they exist in some granny’s notebook or an archive folder that was never digitised, but as of now it’s a piece of history that we might lose forever.

The wind was still pumping. I didn’t feel like going through the frustration (and fear of breaking things) that we had earlier at Paulsberg, and this time we had tall man made structures that were begging for an antenna to be strung across them. It was already getting late in the day. I shared my plan and StJohn and I started executing it. In truth it was a bit of a shambles. Scrambling between the buildings through thick bush, dodging thorns and asbestos roof sheeting. Throw lines that repeatedly got stuck, or were blown off course, lines pulling lose… Our exhaustion by this point also made it increasingly less likely that anything would go right the first time, so there were a few minutes of Laurel and Hardy, but eventually we had a working antenna system strung between two of the derelict buildings.

20190209_143727.jpg

The radio was busy. there was a competition (contest) going on where people from all over Southern Africa were trying to all speak to each other and earn points for each contact. You would think that this would make getting the 4 required contacts easy, but it actually made if harder since there was just so much going on it was hard to get a word in edgewise.

Finally we got the fourth and then fifth contact, it was anticlimactic. The drudge of the day was starting to catch up with our enthusiasm. We had however done it! Two never before activated summits, over 14km hiking, 10 HF contacts, feet in sea in between, and lots of lessons learnt ready to be put in practice next time.

20190209_135604.jpg

We packed up quickly. It was already 3pm and we had been hiking for 9 hours and still needed to descend. On the way down from the radar station I found a hint of a scrambling route which might make returning a bit easier.  The hiking trail is in good condition and made dragging our bodies downhill a bit easier. I don’t remember much from the walk and only took one blurry photograph, testament to how I was feeling by then, and eventually we were standing next to the car.

It’s at this point that I usually start evaluating the day and deciding whether it was a good hike etc. This was tough, but definitely worth the effort and I’ve already made plans to return to da Gama Peak and spend more time there.

Summary

Date: 9 February 2019
Distance and Elevation: 14.5km and 540m Elevation Gain.
Coordinates: Leave Car 1 here,  Car 2 parks here, Head to Paulsberg, Down Bortjiesdrif Trail, feet in the see here, head north hugging the coastline until here, head up to where you parked car 1, hike up the trail to here and then scramble the last 50m up to the summit.
Conditions: Thick mist, high winds, sunny and hot.
Radio Stuff: There is a survey beacon at Paulsberg for your mast. The radar station has various structures to use if the wind is too strong, but on a nice day you can appropriately erect your mast on the old radar tower’s concrete base (with guy ropes).
Notes: Perhaps the combination of the two summits was a bit of a tall order, but individually they are both relatively easy hikes and offer great views and exploring. I’m definitely going to return to both.


011 – Potberg, De Hoop Nature Reserve (7km / 420m Elev)

This summit had been on my list for a while as it is close to where we’re often based at the Breede River. This also marks only the second time in my life that I’ve been in the De Hoop Nature Reserve; the time before was when I was still in junior school!

20190202_201123.jpg

We made our way to the river the day before, Graham on his motorbike, the wife and I with the hounds in the bakkie.  The weather forecast was looking grim but I’ve learnt to never pay too much attention to forecasts. We arrived at around 4pm, Graham at 5pm. We played with some radios, braaied, prepped for the hike and then went to bed.

20190202_110731.jpg

At around 3am the heavens opened. Lightning and thunder, torrential rain interspersed with gentle rain. It didn’t stop. By 6am we were up and it was still raining. There would be signs of the rain clearing and then, with the same ferocity as before, it would suddenly pour down again.

20190202_111051.jpg

We waited, but had made peace with the fact that our hike was likely going to have to be postponed. Graham had to leave later that evening, so we couldn’t try again tomorrow. We made breakfast and watched the rain. It was lovely, but not as lovely as hiking.

20190202_113019.jpg

At around 10am the sky started to clear, the rain quietened to a dull patter on the roof. We waited for it to return like it had so many times before… the lull seemed to be lasting, we decided to carpe diem and make a run for it, quickly getting our boots on and the bakkie packed. It’s about a 20 minute drive from the house to the De Hoop conservation centre, it drizzled occasionally on the way, but not enough to scare us off.

20190202_114631.jpg

De Hoop had that chilly post-rain feel to it. Everything looked clean and cold, but inviting. We bought our permits and drove to the trail head. This hike isn’t particularly demanding but we knew that we were tackling it with a high likelihood of being thoroughly and miserably washed out. We started hiking. The route takes you through small forest and then out onto the exposed southern slopes of the Potberg mountain. We hiked some more.

20190202_131006.jpg

It was windy. It began to drizzle, we wrapped our bags… it began to rain, we pushed on… I could hear the water sloshing in my boots, always a great sign. The winds became violent and reminded me of Roald Amundsen’s heroic Northwest Passage traversal, except I had cheese and ham sandwiches in my bag and could still see where we parked the car 🙂

20190202_132904.jpg
See, he survived!

After a bit more hiking the rain subsided, and then the wind died down. Graham wasn’t feeling great and since the first rule of hiking club is “leave the weak behind“, I left him lying on some bushes with a packet of energy sweets and jogged the last 1km uphill to the summit. (He is a very experienced outdoorsman and joined me at the summit a short while later).

20190202_141629.jpg

The summit, as most of them are, is quite spectacular. You get to see the river from a unique perspective, and see how it winds back on itself in places, a characteristic which is not obvious even when you’re on a boat travelling down the river.

20190202_141729.jpg

We set up the antenna and radio (a bit too close to the commercial repeater site, but we live and learn) and then started doing some radio’ing. The weather had made a full recovery by now and I was starting to get uncomfortably hot and worrying about sunburn, which always amazes me. My boots were still full of water.

20190202_143627.jpg

Graham, the ever-avid birder, spotted a large white-ish bird flying nearby. It was massive and graceful. Then we spotted others, and as they flew closer it became clear that they were Cape Vultures, a bird that even I know is a big deal because of its endangered status. Tick.

20190202_162302.jpg

The radio’ing was good but not great, mostly due to the local RF noise from the nearby repeater site. We did make the required number of contacts to “activate” the SOTA summit and I got to chat to the wife on the walky talky (she was a few km away directly beneath the summit)

20190202_164225.jpg

Because my hiking buddy still had to ride his bike back to Cape Town we figured it best to pack up and head back. The walk back was less polar explorer and more afternoon ramble. De Hoop is a beautiful reserve and from the summits you get a good idea of how big and diverse it is. From dense forests to mountains, to beaches that go on forever. There’s a ton of hiking still to be done there and I look forward to heading back.

Summary

Date: 2 February 2019
Distance and Elevation: 7km and 420m Elevation Gain.
Coordinates: Start Potberg Conservation Centre (De Hoop) (take cash for a permit)  Potberg Summit: -34.3712319, 20.563017
Conditions: It rained and then it got hot. Lovely!
Radio Stuff: There is a survey beacon but it currently has a microwave repeater strapped to it, so that won’t work. My suggestion is to get at least 100m away from the commercial repeater stuff, 200m would be better.
Notes: The second rule of hiking club is: No you can’t borrow my socks.

010 – Table Mountain Fernwood Circuit – (10km / 300m Elev)

Sometimes it is good to go back to basics. It doesn’t always have to be summit conquests or never before explored trails.

20190127_095528.jpg

The trails on the Eastern side of Table Mountain are as diverse as the people who hike them. Kids on tricycles, families with prams, overcompensating mountain bikers, trail-running bros with their shirts off, and senior citizens grinding out the kilometres and putting us all to shame.

20190127_102232.jpg

The best place to start is the Newlands Forestry Station. It is centrally located and safe(r) due to the large numbers of people who hike there. From the station you have any number of options. You can do the gentle forestry road loops through the forest, head uphill to connect with the contour path (a trail that encircles most of the mountain at around 400m elevation), head South towards Kirstenbosch Gardens or North towards the City Bowl. If you connect with the Contour Path there are a number of routes to the summit (Nursery Ravine which pops out on top of Table Mountain at Hely-Hutchinson Reservoir) or Newlands Ravine which heads up to the Saddle between Table Mountain and Devils Peak.

20190127_105614.jpg

When I set off I didn’t actually have a plan. I know this part of the mountain really well and wanted to see where it took me, so I looped through the forest and then headed South towards Plumpudding Hill directly above Rhodes Memorial. An interesting thing about this spot is that you can still see the large concrete base from a radar reflector that was installed after the 1971 crash of three SA air force planes into the side of Devil’s Peak. The reflector was installed to lessen the sting of human error, but it soon became dilapidated and was eventually removed.

20190127_103633.jpg
The survey beacon at Plumpudding Hill

From here I scrambled up the terribly maintained (crumbling rocks etc) path towards the block house. This is not the best way to get to the Contour Path, but it works.

20190127_105454.jpg
Fernwood begins

20190127_105815.jpg

20190127_110110.jpg
Water at First Waterfall

At the Contour Path I headed South towards First Waterfall. This is a magical place to be, even in summer and I highly recommend making your way up to the waterfall and getting yourself wet. In the depth of winter rains some crazies come up here and stand under the tons of water falling on them (I plan to do this soon) but today, mid summer, it was just a gentle stream. I sat for a while and drank my coffee while chatting with some passers-by who then went on their way. Then something magical happened.

20190127_114428.jpg
Friends looking perplexed

I heard rocks falling. Movement above me? Who would be so dumb to be climbing up there, knocking rocks off and knowing that people are below them! I moved away from where the rocks were falling and looked up. A Himalayan Tahr was staring at me. Then another, then another. They seemed to trying to figure out if I was a threat, but doubting my apex predator skills. Once they had decided that I was a noob they carried on with what they were doing. Clambering down the rocks to get to the stream above the waterfall. I watched them for 20 minutes.

20190127_114219(0).jpg

The Tahrs are controversial and are obviously not indigenous. They are the offspring of (supposedly only 2) Tahrs that escaped Groote Schuur Zoo in the 1930s. There have been numerous attempts to cull them, and numerous funds started to absolutely not cull them. Ironically, they are endangered in many countries, including India, who has supposedly asked for them to be caught and donated to India. Regardless of your views on them, it is still incredibly special to experience moments like this with wild animals up close.

20190127_120128.jpg

I left the Tahrs and kept heading South along the contour path. The Fernwood Trail has been wonderfully done up with raised walking paths ensuring that the ecological impact of hikers is minimal, and allows you to walk for ages while being completely surrounded by shady indigenous forest. Ever corner another postcard-perfect image.

20190127_120309.jpg

After a while the Contour Path opens up and you start to see the Southern Suburbs. At this point you could continue all the way to Kirstenbosch Gardens and eventually Constantia Neck. Both are great walks, and Uber makes getting back to your car very easy.

20190127_121044.jpg

I had to head down though, and took one of the many paths downhill (just after Newlands Ravine), then wound my way (a bit aimlessly) through the forest and over rivers etc until I got back to the Forestry Station.

20190127_121238.jpg

All in all, a lovely walk and as usual, every hike adds something new to the list… this time it was the Tahrs up close. I highly recommend hiking in this area. It has something for everyone.

Summary

Date: 27 January 2019
Distance and Elevation: 10km / 300m Elevation Gain
Coordinates: Start Newlands Forestry Station Plumpudding Hill First Waterfall Head down from Contour Path
Conditions: On the day it was sunny and not too hot. If you stay in the forested area you’ll be in shade a lot of the time.
Radio Stuff: Take an HT as there are some locals who monitor 145.500. Plenty of trees for HF antennas.
Notes: This area is notorious for muggings, so go into it with that in mind and try and stay close to the busier areas.

009 – Mont Rochelle to Dutoitskop (8km/ 750m Elev)

Mont Rochelle had been on my list for a few weeks. A friend had suggested one of the lower peaks as a great spot for a radio setup, but since the actual summit (Dutoitskop) was a SOTA summit I decided to get to the top instead. Got to collect those sweet internet points.

20190120_060602.jpg

Mont Rochelle is a private Nature Reserve and very well organised. I called them a few days before the hike to make sure that I could set off before their official opening time and they were very friendly with their “yes, of course!”.

20190120_064028.jpg

I was the first car in the misty parking lot at 6am. You park your car far away enough from the road that it feels relatively safe even though there’s no one there to watch it that early.

20190120_072123.jpg

The routes are well marked and as I climbed the mist began to burn away and in its place were amazing views in every direction. There was no wind. I felt like I could have heard a caterpillar chewing a leaf nearby if I had listened carefully.

20190120_075133.jpg

The more I hike the more I appreciate the quality of the trail. How well it was originally planned and how well it is maintained. The Mont Rochelle trails are wonderful in this regard.

It was a long slog for me, especially carrying a 15kg pack. I sent some friends an optimistic ETA for the top, then half an hour later had to “lol, no” that message.  The last 2km felt like it was 90% vertical and someone had hid rocks in my pack. I slogged, stopping every few minutes to let my body cool down and my heart slow to a mild panic. My tongue felt like a flap of dry leather in my mouth.

20190120_083149.jpg

I heard some people behind me on the trail, maybe as far as 1km back. They were gaining on me. The indignity of being passed by a group of hikers pushed me forward… This was my Rocky moment.

20190120_083649.jpg

Eventually, as these things have a way of happening, I reached the top (first!). It was spectacular. The weather was absolutely perfect. Clear for a million miles in every direction with some high cloud cover to break the heat, and not a breath of wind.

Dutoitskop is a lovely summit as there are multiple ways up and it’s quite flat at the top, so that multiple groups can be up there chilling by themselves.

20190120_095759.jpg

I obviously hogged the survey beacon because it makes putting up my antenna a lot easier. The radio’ing was fun, I “activated” the summit and then continued to chat to a few of the regulars from around the country. In some ways this is a bit like a group of friends who meet for coffee once a week. The same voices, with a few new ones every now and then. There was even a group of hams doing some operations at Piketberg (120km away) and I was able to chat to them crystal clear on my cheap Chinese walky talky.

20190120_100116.jpg
Can you spot Table Mountain?

This hike was way more about the beauty of nature (and the conquest of summits) than the radio. I spent a lot of time just looking. Dutoitskop is a very unique summit. From the top you can see Table Mountain and Lions head, the Teewaterskloof Dam and, incredibly, the Wind Turbines at Caledon. It is almost hard to comprehend all those things could be visible in the same picture.

20190120_113223.jpg

20190120_121025.jpg

The route down was tough. It was hot and my feet were burning from 20 years of not using them enough (and a bit of shitty genetics). The lack of wind persisted and the cool walk up was replaced by an oven walking down. Mercifully, the condition of the trail  made it easier to descend while exhausted.

20190120_144915.jpg
Taking a break in a tiny spot of shade.

20190120_150509.jpg

When I was a few hundred meters from the conservation office a young couple traipsed past me in their trail running shoes and hydration packs. I was okay with the indignity. I was still the first person at the top.

Summary

Date: 20 January 2019
Distance and Elevation: 8km and 750m Elevation Gain.
Coordinates: Start Mont Rochelle Nature Reserve (take cash for a permit)  Dutoitskop: -33.8825236, 19.1491087
Conditions: I could not have asked for better weather on this hike. I imagine it could get blisteringly hot up there, so take lots of water. There are no streams on the Dutoitskop summit trail.
Radio Stuff: Highly recommend using the survey beacon for your mast, but beware that hikers will be walking past your kit, so take something bright to mark your lines.
Notes: This is a great hike and area in general. There are a bunch of shorter/easier options, so go have fun!


008 – Paardeberg to Rocky Outcrop (7km / 405m Elev)

The Paardeberg packs a lot of opportunity into a tiny mountain range. There’s a thousand different routes and something interesting around every corner. I had done some exploring in the area a few years back and had a reasonable sense of the trails but decided to just start hiking and see where things led me on the day.

20190112_061603.jpg

We started from Fynbos Estate (which looks like a wonderful wedding venue) who graciously gave us permission to hike from their land. We headed up the valley via the steep jeep track while the sun slowly rose from the east, illuminating the towering Sonkop cliffs to the west. The ground was wet from overnight rain; yet another miraculous weather change at the last minute enabling one of my hiking missions. It was cool with absolutely no wind. The sound of baboons (I hope those were baboons) arguing on the cliffs above, occasionally sounding creepily human and making you wonder if someone might be calling out to you.

20190112_062808.jpg

The path winds its way upwards and soon you’re looking down on those baboon cliffs and the horizon begins to spread out in every direction. At the first major fork we turned right (left takes you to Dragonridge and some radio masts but we wanted more altitude).

20190112_063448.jpg

The route alternates between wide open veld and lush fynbos forests that engulf you as you walk through them. I was hot from all the climbing and dragged my arms through the refreshing tall grasses, still wet from the earlier rain, no fancy spa treatment could compare!

20190112_081602.jpg
What causes this? How old is it?

We explored some rocky outcrops just off the path while sipping the first cup of coffee. My love (and ignorance) for geology growing with every adventure. Weird shapes that must be formed by water? How? How long ago? Surely I’m the not the first hominid up here wondering the same thing?

20190112_084311.jpg

One possible outcome of this hike was to get all the way to Kanonkop which we could now see in the distance, but truthfully neither my hiking partner or I had any interest in adding another 10km to our hike only to reach a spot covered in electrical boxes and radio masts.

20190112_093123.jpg

We decided to rather head to a huge outcrop of rocks perched on top of a hill, but weren’t sure how to get there so carried on along the path to see where it went (always a good idea). At the top we were greeted by another spectacular panoramic view of the valley, with Kanonkop on our right and the Paarl Valley spreading out around us.

20190112_093143.jpg

From the lookout point this path clearly headed in the direction of Kanonkop, but with no clear route to the rocky outcrop that we wanted to get to. We decided to backtrack and look for a way up. We didn’t find one so were forced to bundu-bash a short distance through some thick vegetation to get there. My hiking companion was not impressed by this but I kept reassuring him that it’s a great story to tell, especially the part about how his crazy friend dragged him through a thorny forest for no specifically good reason.

20190112_094920.jpg

From the top of the rocky outcrop you get yet another incredible view, this time of the Perdebergdam and the valley surrounding it. It took me a while to realise that this was the dam that I had visited a year before when exploring the area. It is funny how your orientation can snap into place when you add context.

20190112_120505 (1).jpg

It was a bit windy and slightly chilly. We set up the antenna and I started making contacts while my hiking partner explored the area looking for an easier route down.

20190112_101401(1).jpg
A black kite inspecting our rigging

A few minutes later we noticed that a black kite was circling us. At first it just seemed like a coincidental fly-by, but then it circled again, closer, slower, intently looking at us. We started taking pictures thinking that any second now it would fly away.  Instead, for 15 magical minutes, it circled us, round and round, flying lower and slower.  So close that when it was at the same height as us we could see it’s eyes moving back and forth as it tried to figure out what we were up to. Eventually we must have become boring and it drifted off into the distance. I like to think we’ll meet again.

20190112_064100.jpg

We spent the next hour discussing our bird friend and talking to people across South Africa and Namibia. The weather closed in on us a bit and it seemed like a good segue to packing up and heading back down.

This is a really magical part of the Western Cape. On a map the entire mountain range is a small green dot, but hiking here is a world of its own and gives you context for how big this country really is and reminding you how many more adventures there must be out there in other small green dots on the map.

Summary

Date: 12 January 2019
Distance and Elevation: 7km and 405m Elevation Gain.
Coordinates: Start Fynbos Estate (get permission!)  Rocky Outcrop: -33.5809308, 18.7983747
Conditions: Cool in the morning with a strong breeze later in the day. The shady valleys on the way up can get chilly.
Radio Stuff: You’ll need a telescopic mast. There aren’t well situated trees to string anything up.
Notes: I’d like to go back and do a longer route, perhaps one that traverses the entire mountain range in a day.

paardebergmap.png

paardebergelev.png

IMG_1947 (2).jpeg
A photo from a year before at the opposite side of the Perdebergdam. Top right corner of the mountain is where we were set up.